
Do-It-Yourself Supercritical Drying
Like all good engineering projects, building and operating a supercritical dryer comes with its fair share of challenges and surprises!
Post pictures, problems, and procedures of your own here to share with the rest of the open source nanotech community.
Interested in building your own system? Check out how to Build a Supercritical Dryer in the Make section of Aerogel.org.
Hi Majid,
We’ve just posted two articles on how to do supercritical drying under Make > Gel Drying Procedures that might help as well.
Hello majid,
When I have my manuclave pressurized and filled with CO2 right after placing gel inside, I perform first solvent exchange. The intake valve is opened and then I slightly open the drain valve. What is coming off the drain valve is CO2 snow that melts into the solvent which I used in gel.
Regards,
Szymon B
Hi Szymon
Thanks a lot for the good information about your dryer.
I have a question about exchange the solvent with CO2. You mentioned that Co2+solvent go out from the vessel through the drain valve. (Am i right?) In this case, are both of them in gas phase during release (when they are coming out) or liquid phase?
Hello all,
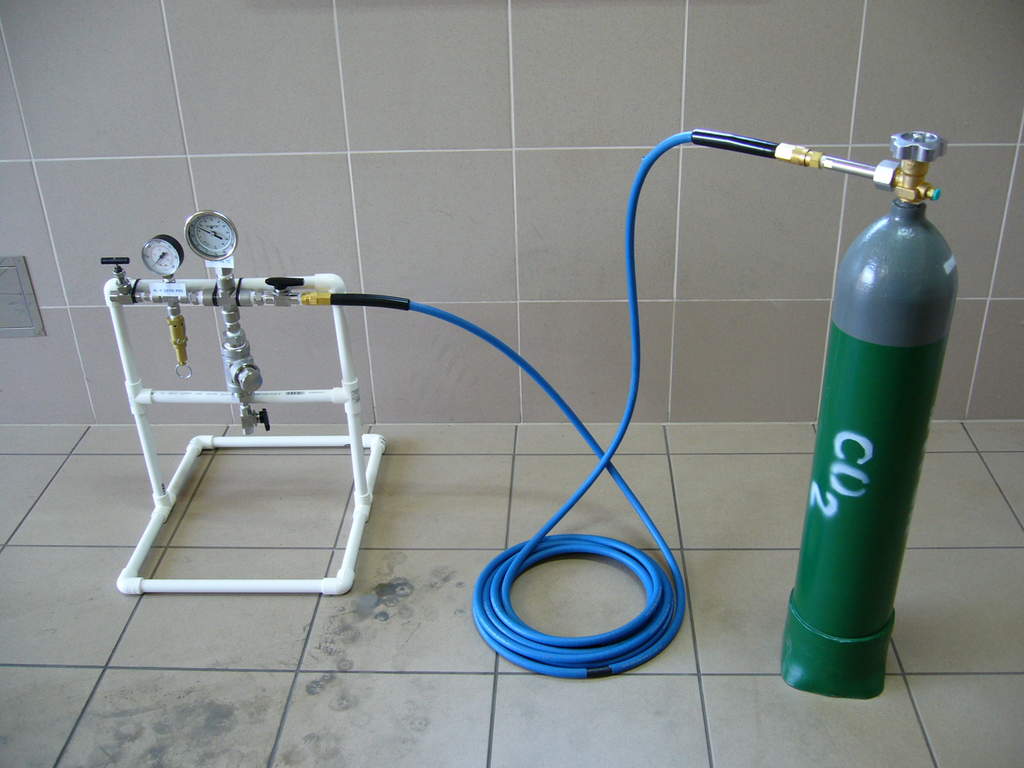
I posted in Questions and Answers section in August that I am working on my aerogels project. With a help of Stephen Steiner and his plans I was able to build my CO2 supercritical dryer. Here, I want to give you some notion of what I made so far before I will write in the future a more detailed description on aerogel.org (including parts list). Several photos are attached. I ordered the first part in May but, despite working periodically on my machine, I performed the first drying in November. It took me MUCH time and effort to find suitable parts, assemble the manuclave and seal it. And this is only the beginning of my project!
Finding proper parts was the most difficult in my case. Stephen made a detailed list of McMaster – Carr products which can be used in the manuclave, but the problem is that MM-C doesn’t ship outside US. And besides this store, it was not easy to find such high pressure equipment, especially if you haven’t ever been involved in this topic. By the way ‚Äì McMaster-Carr is a truly impressive technical/DIY on-line store and I deeply regret that they don‚Äôt ship to Europe.
Ultimately, one manufacturer that I found especially useful was Swagelok (www.swagelok.com). It has a local dealer in Poland, however they have VERY high prices on Swagelok products. Because of this, I used eBay.com as often as I could. Swagelok equipment appears to be very, very high quality and well-engineered. They also have wide range of products.
Besides Swagelok I used Noshok gauges – see http://www.noshok.com. They have their own official eBay store: http://stores.ebay.com/NOSHOK-Direct (3000 psi pressure gauge costs $3.50!). Several remaining parts are from various brands.
My dryer has a 1” NPT Tee as a main chamber. It absolutely does not require any welding.
Assembling and sealing the thread connections:
Size: ¼” NPT – 3 winds of thin (0.075mm) PTFE tape and screwing with a small (14cm Рlong) wrench. Light tightening (while holding with second wrench) does the job.
Size: ½” NPT – 5 winds of thin (0.075mm) or 2 with thick (0.2mm) PTFE tape and screwing with a medium (18cm Рlong) wrench. Just tightening by hands (while holding with second wrench) does the job nicely.
Size: 1” NPT – 2 winds of thick (0.2mm) PTFE tape and acrewing with large (29cm Рlong) wrench and a vice. Most intense tightening required. My workshop table is quite delicate so I can’t tighten the connections by pushing the wrench with my body weight (my vice would break the table). Fortunately, just reasonably strong tightening is working fine (no noticeable leaks when I left manuclave pressurized for 3 days).
No other connection threads and sizes present.
Drying.
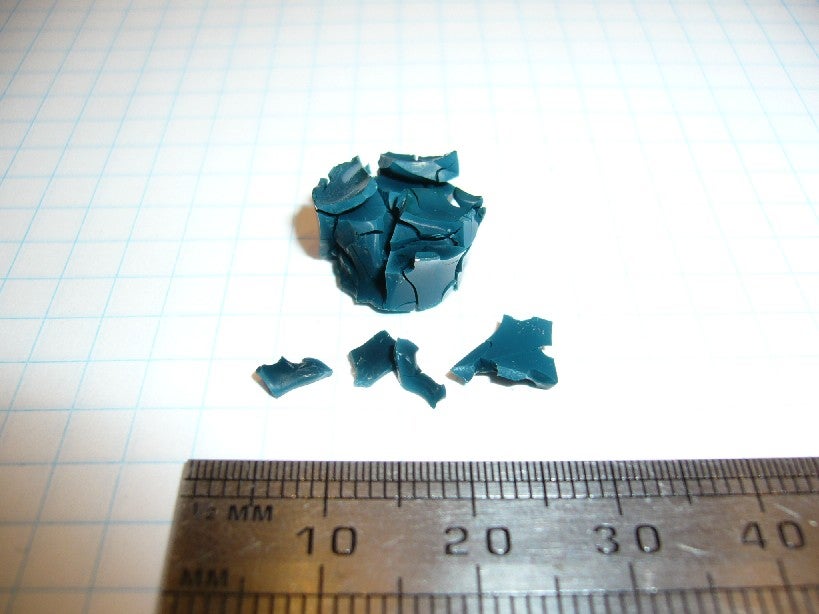
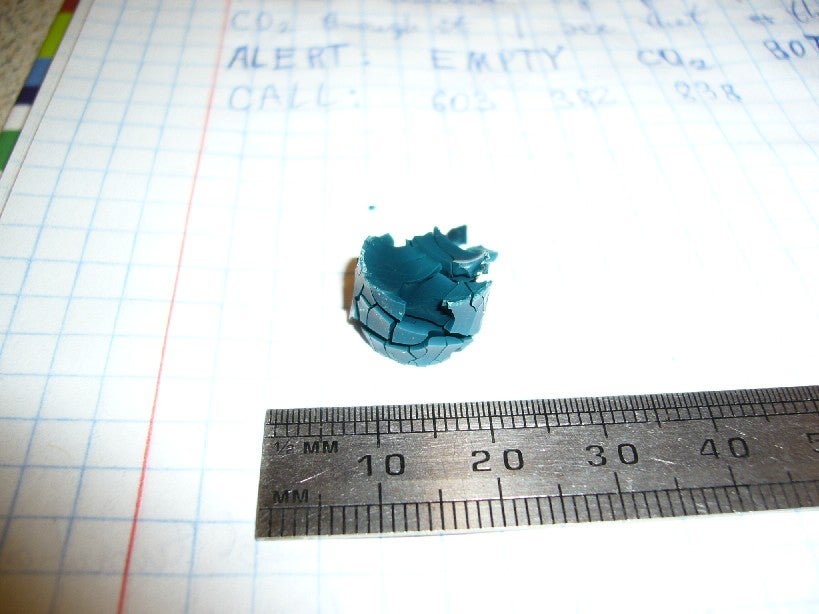
So far, I made 2 supercritical dryings of 2 chromia aerogel samples. Photos of both are attached. They are very cracked and shrunk, but hey, I made aerogels on my own. Later I will hopefully obtain some better looking ones…
My current drying procedure is probably not perfect yet but was able to yield some aerogels. Very short description:
Day 1: Pressurising the chamber and releasing CO2 with needle valve until liquid/snow shows up. Then, releasing CO2 with drain valve (bottom ball valve) and by needle valve to fill the chamber with liquid CO2 and exchange some gel solvent (during exchange the inlet valve is open).
Day 2. Solvent exchange by releasing CO2 with drain valve and by needle valve.
Day 3. Solvent exchange by releasing CO2 with drain valve and by needle valve.
Day 4. Solvent exchange by releasing CO2 with drain valve and by needle valve.
Day 5. Supercritical drying. I used a heat gun for heating the chamber and it works very well.
First, I heat the chamber to about 35C-40C to reach the pressure of about 1500PSI. I release CO2 slowly so after a while the pressure is about 1150PSI. I heat the chamber to reach 1500PSI again. I realease to about 1150 and so on.
When I have to heat the machine to large temperatures (maybe 60-70C) to reach 1500PSI, it is a sign that I can finish. When it’s 1500 PSI, I set the needle valve so it hisses (but not loudly) and the chamber is depressurized in about 2 hours. While doing that the temperature should not fall below 31C (critical temperature).
So this is a very short story of what I have done so far… stay tuned. I would love to answer some questions from you.
Regards,


Szymon Bartus
The image link above did not come out right. Try this:
http://www.se-ltd.com/~lerman/gallery/v/CriticalDryer/D64F2567.tif.html?g2_imageViewsIndex=1
The purpose of this posting is to tell you how I built a hydraulic pump to test my super critical dryer. I’ll start with a little background.
I’ve started work on building what I’m calling a “MaxiClave”. It will be a cylinder with an internal diameter of six inches and a height of three inches. The walls are about .800 thick. The top and bottom are 1/2 inch steel plate each held on with ten 3/8-24 cap screws.
One of the concerns I have is how to test that the assembly can withstand the pressure. All of the calculations say it should, but I’d like to test it anyway. My test plan is to fill it full of water and then use a hydraulic pump to pressurize it up to my test pressure. Rather than buying a hydraulic pump and having to deal with issues of water mixing with hydraulic fluid, I’ve built a pump. Here is how you can build one…
Start with a three inch schedule 80 seamless steel nipple. Drill the length with a letter ‘Q’ drill. Then drill and ream all except for 1/2 inch of the length to a 3/8 inch ID. I used a half round drill bit, but you can drill it to 23/64 and then ream it to 3/8 inch. Tap the unreamed end with a 3/8-24 tap. All of this should be doable with a drill press or perhaps even an electric drill and a way of clamping the nipple. You might want to screw it into another fitting to help hold it steady.
Now make a brass piston. Cut a length of 3/8 inc brass rod to 5/8 inches long turn a .100 groove around .075 deep for an o-ring. I have to admit, those are the measurements from memory. You will need to match the groove to the o-ring you use. Did I lose you here? If so, the first ten people to send me a self addressed stamped padded envelope will get a piston by return mail. I believe you will need $1.05 for postage.
Take the piston and insert it into the nipple, pushing it as far as it will go. Put an 1-1/2 inch long 3/8-24 screw in the other end. Screw this assembly into a 1/4 NPT hole in your pressure vessel. Fill the whole shebang with water. You will want to get as much of the air out as possible because the pump has a very limited stroke.
Turn the screw and watch the pressure on your gauge increase. The photo below shows the pump connected to an old oxygen pressure gauge I had sitting around. Using a five inch allen wrench, and holding the gauge in my hand, I was able to pressurize this to 3000 psi. That’s as high as I cared to go.
[img]http://www.se-ltd.com/~lerman/gallery/v/CriticalDryer/D64F2567.tif.html?g2_imageViewsIndex=1[/img]
I am a development engeneer in the building material business. I’ve got in contact with Aerogels first beeing busy with thermal insulation properties of materials.
I am fascinated from the hugh variaty of outstanding physical properties and therefore interested in everything in connection with Aerogels.